
People picker - Learn how to create a customised people picker
People Picker
It is often used to select one or more people from a list. Simply search for a field, such as name, e-mail address, company, etc., and you'll be automatically found.
Power Apps allows you to use this from a template in the 'New Screens > Templates' tab or also with a component from the 'PeoplePicker control reference (preview) - Power Platform | Microsoft Learn' creator kit, however both options are restricted and not very customisable. That's why in this article we'll make an easy and customisable people picker for use within apps.
1 - Build user gallery: Table with user data
Initially, we created a GalListUsers gallery with the necessary user data. This gallery will allow us to list them.
Write this code in the Items property of the gallery.
|
Table(
{ID: 1, Name: "Rodrigo Sousa Gomes", Email: "
{ID: 2, Name: "Lara Ribeiro Cardoso", Email: "
{ID: 3, Name: "Rafael Costa Pinto", Email: "
{ID: 4, Name: "André Fernandes Correia", Email: "
{ID: 5, Name: "Isabel Azevedo Sousa", Email: "
)
|
Then write this code in each gallery property.
|
Wrap count: 1
Template size: 50
Width: 400
Height: 485
|
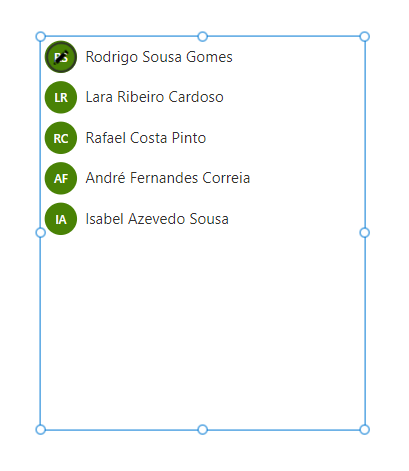
To see the initials of the name insert the btnInitialsUsers button inside the gallery and then write this code in each property of the button to get the same style as shown in the image above.
|
Text: Left(ThisItem.Name, 1) & Mid(ThisItem.Name, Find(" ", ThisItem.Name) + 1, 1)
DisplayMode: DisplayMode.View
X: 12
Y: 5
Height and Width: 40
Color: RGBA(255, 255, 255, 1)
Fill: RGBA(73, 130, 5, 1)
Size: 11
Border radius: 20
BorderColor: RGBA(219, 219, 219, 1)
|
Then insert a label to display the user's name lblNameUsers and write the following code in each label property.
|
Text: ThisItem.Name
X: btnInitialsUsers.X + btnInitialsUsers.Height + 10
Y: btnInitialsUsers.Y
Width: Parent.TemplateWidth - 173
Height: btnInitialsUsers.Height
PaddingTop: 8
Color: RGBA(53, 53, 53, 1)
Size: 14
|
2 - Integration of the text box to allow searching
An important part of this people picker is the user's search for the defined field (in this case we'll allow searching by name and email). For this search you need to insert a Text Input txtSearch with the following properties...
|
Format: TextFormat.Text
HintText: Search…
X: GalListUsers.X
Y: GalListUsers.Y - Self.Height
Width: GalListUsers.Width
Height: 40
PaddingTop: 5
PaddingBottom: 5
PaddingLeft: 12
PaddingRight: 5
BorderThickness: 1
BorderColor: GalListUsers.BorderColor
Size: 12
|
For the search to take place within the gallery, you need to change the Items property of the GalListUsers gallery to include the 'Search()' function.
|
Search(
//Source initially created
Table(
{ID: 1, Name: "Rodrigo Sousa Gomes", Email: "
{ID: 2, Name: "Lara Ribeiro Cardoso", Email: "
{ID: 3, Name: "Rafael Costa Pinto", Email: "
{ID: 4, Name: "André Fernandes Correia", Email: "
{ID: 5, Name: "Isabel Azevedo Sousa", Email: "
),
txtSearch.Text, //Text of the search that will filter the gallery
"Name", "Email" //Name of the columns we want to filter
)
|
We've almost finished our people picker! We're just going to save who we've selected and create a gallery to allow you to see the selected users.
3 - Collection with selected users
So first we're going to create the collection that allows us to store the data we've uploaded. In the OnSearch property of the GalListUsers we write the following code:
|
//Collection for selected users
Collect(
colSelectedUsers,
{
IDSelectedUser: ThisItem.ID,
NameSelectedUser: ThisItem.Name,
EmailSelectedUser: ThisItem.Email
}
)
|
To improve the perception of who is selected and to avoid duplicates of selected users, we have added a btnFillSelectedUser button to the GalListUsers. All you need to do for this button is include the following properties:
|
DisplayMode:
//If the gallery item is in the collection column (gallery ID equals collection ID)
//Can't click on the same user
If(ThisItem.ID in colSelectedUsers.IDSelectedUser, DisplayMode.Disabled, DisplayMode.Edit)
X and Y : 0
Width: Parent.TemplateWidth
Height: Parent.TemplateHeight
Fill: RGBA(0, 0, 0, 0)
DisabledFill: RGBA(219, 219, 219, 0.5)
HoverFill: RGBA(187, 221, 140, 0.3)
|
4 - Build a gallery of selected users: Collection with selected users
Now it's time to allow users to be removed, so we've created a gallery galListSelectedUsers and in the Items property we've placed the collection colSelectedUsers. And in the properties, the following characteristics:
|
X: txtSearch.X
Y: txtSearch.Y - Self.Height
Width: txtSearch.Width
Height: 100
WrapCount: 2
DisabledFill: RGBA(219, 219, 219, 0.5)
HoverFill: RGBA(187, 221, 140, 0.3)
|
To finalise the people picker and make it ready for future applications, let's customise the galListSelectedUsers as shown in the image below.
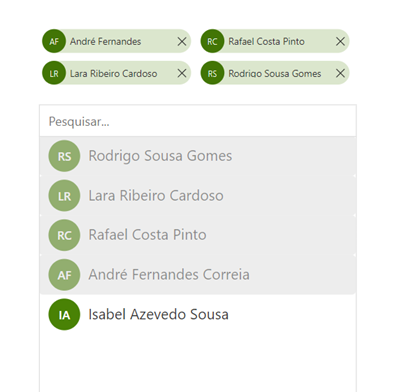
We've inserted a deactivated btnBackgroundSelectedUser button for the background of the selected item...
|
X and Y: 5
Width: txtSearch.Width
Height: 100
DisplayMode: DisplayMode.Disabled
DisabledFill: RGBA(219, 230, 205, 1)
|
Other button btnInitialsSelectedUser for the user's initials…
|
X: btnBackgroundSelectedUser.X
Y: btnBackgroundSelectedUser.Y
Width and Height: btnBackgroundSelectedUser.Height
DisplayMode: DisplayMode.Disabled
DisabledFill: RGBA(66, 117, 5, 1)
Text:
//Get the initials of the names
Left(ThisItem.NameSelectedUser, 1) &
Mid(ThisItem.NameSelectedUser, Find(" ", ThisItem.NameSelectedUser) + 1, 1)
|
A label to display the user's name with the Text property : ThisItem.NameSelectedUser
And finally the possibility of removing the user via an icoRemoverSelectedUser icon with the following characteristics:
|
OnSelect:
//Remove the item from the collection
Remove(colSelectedUsers,
LookUp(colSelectedUsers, IDSelectedUser=galListSelectedUsers.Selected.IDSelectedUser))
X: btnBackgroundSelectedUser.Width - Self.Height
Y: 13
Width: btnBackgroundSelectedUser.Height / 2
Height: btnBackgroundSelectedUser.Height / 2
|
Thanks for reading and I hope you enjoy it. See you soon 😊
